


Tra la la, I finally did a robe la francaise. It is so poofy and fluffy and I love it. To be honest, up until six months ago, it was a style I was not very fond of. I do enjoy the many paintings showcasing the gowns but I prefer the robe a l'anglaise with the gorgeous fitted back and pleating. However, something clicked after seeing some beautiful recreations. There is nothing more magical than watching a woman walk in a robe a la francaise, the silk billowing behind her. Once I finished the stays and pocket hoops (detailed in my previous blog entry), I knew I was ready. Or at least, I thought I was ready. Is anyone ever really ready for 350 inches of trim?

Detail from Gersaint's Shopsign by Jean-Antoine Watteau, 1720

The quintessential francaise painting - Declaration of Love by Jean Francois de Troy, 1731 (and who wouldn't declare love to that gorgeous ensemble?!)

Robe a la francaise from the collection at the Victoria and Albert Museum
I read through the American Duchess book three times. I read through several bloggers (if you havent read The Fashionable Past you are missing out. She is wonderful with photos and explanations). The nice thing about the American Duchess book is that they show everything using hand sewing. If you decide to switch to a machine its doable, but how great to have options. There are pictures for every step and they cover several different gowns. I started with the white linen lining. I already had a basic block from my last gown and I fully admit I had Simplicity 8578 to refer to in case I had a meltdown over drafting and draping. So I ended up using the back lining piece (yes, its accurate!) and that worked out well. The book DOES include scaled patterns that you can size up but I am just not comfortable doing that yet.

Me at ye olde Joanns taking a pattern picture (that's right, I'm going to make this a thing)
I then started to drape my silk over it, starting with the back. Oh those back pleats. They are the essential bit of the gown. I could not grasp the pleating. I re read the American Duchess instructions. I pulled out several other books. And then I contacted a friend with no 18th century experience but nevertheless a skilled seamstress and had her break it down for me several times. Whatever it takes, right?! I hand sewed the pleats at the top of the back lining piece and then sewed them down four inches from the top (as instructed in the book).

Success! At this point I was so excited I forgot all about the miles of trim ahead of me.
Once the back was done it was smooth sailing. I hand sewed the front two pieces to the side back seams. I hand sewed the shoulder strap. A gore was used as detailed in the book and I found myself with a bit too much fabric to pleat but it was ok, I just went along with it. I followed the directions to do the draping in the front. I tried it all on and was so excited it was starting to look like something! One of my favorite parts of the process is realizing how much sense everything makes. You drape and fit to the person so that you can conserve fabric and also get the best fit. When I started historical costuming this was the most frustrating part for me. There is no set pattern and exact way of making the gown. You MUST fit it to your body and do some draping. Now I can appreciate it and embrace the challenge.

Woohoo, look, a dress!

Hand sewn front to back/side piece with the pleats at waist. I actually enjoyed doing this plus hand sewing gives you complete control.

This was so satisfying to sew
The trim did not go fast (have I mentioned the 350 inches of trim? No? There was 350 inches of trim. Not that I counted or anything). I have no idea what I was thinking but clearly I wasn't. This is where I veered from the book. I did not want the same trim so I came up with my own design - a double gathered strip of trim because I like to torture myself. I measured the length of what I wanted covered in trim and then multiplied by two to get the final length to gather. And then I grabbed my scallop scissors (on amazon for $12!) and went to work. I got through the BBC Pride and Prejudice AND Northanger Abbey while cutting (Felicity Jones is so adorable). I cut and cut and hand gathered and hand gathered. At one point I called my friends and said I wouldn't finish in time, go without me.

Look at all those scallops. So many scallops.

All I can say is thank goodness for Amazon Prime videos
I still wasn't sure what I wanted to do about trimming the gown so I just ignored it for the time being. Once the petticoat was trimmed it felt like the worst was over. I ordered clocked stockings to congratulate myself on getting this far.

Helloooooo frilly petticoat. Even my uggs approved.
I knew I wanted trim in the traditional manner along the neckline and down the skirt front. I did try to do the swirls on either side but it was too much. I apologize there is no photographic evidence of that disaster. You will have to trust me on this one. I looked like I was being eaten by trim. I decided to do something a bit more restrained and the trim was wide enough it would make a statement.

Neckline trim tacked on. Poor Betty got stuck so much.
The stomacher was so much fun! First I tried everything on and put a big square of lining fabric in the place of a stomacher. I used pins to mark where I needed to cut and added a little seam allowance. I used a nice thick linen for lining and placed the silk on top, whipstitching the two together. I twisted and twirled and hand sewed that trim down. I am really happy with how it turned out, it's my favorite part. I added three tabs on either side to help with pinning it on. I had read several times this would help and I was already scared about doing the pinning (go big or go home,right?!). It is also period correct!

Betty wearing the francaise with style, no bows or lace yet
Finally FINALLY I really was almost done. Except the bows. And the lace. Er, yeah. No biggie,right? I'll just pop down to Joanns and grab some lace. Ha, jokes on me. They had nothing. I had days til the event and not many options that weren't astronomical in price. Oh dear. So I sucked it up. I went to a local shop and begged for help. And they did help! I found some lovely lace. I couldn't buy 3 yards of it but I could make do with one and it was so nice. Then I spied some changeable silk in pink and blue. It was so beautiful. I almost wish I had done my entire gown in it. I knew it would be the perfect accent as bows. For once, my last minute dash worked out smoothly (half the fun is getting the adrenaline pumping). The American Duchess book has a little section on making 5 looped bows, which I appreciate. It is nice that all the details are included.

This was attempt number one and it fell very flat. It looked too bo peep. No thank you.

So much better. Even though poor Betty has a popped stomacher.
And then just like that I was ready. I got a fan and some rouge from LLBC (historical cosmetics). I put on my pearl earrings (from Dames a la Mode). I quickly popped some bows on my old shoes and rolled up my pink clocked stockings. I did indeed pin the stomacher and gown. It actually was not awful and I am pleased to report they stayed put. It is a really great way to fit a garment. I can readjust and fit the gown exactly how I want it. I think I may just use pins from now on. Those 18th century women knew what they were doing!

Make up and hair done (even a tiny patch!). I tried to powder my hair to no avail. I definitely need to try harder next time. The overalls are not historical, for the record.

Stocking and shoes (that are not really very accurate but pretty nonetheless. And most importantly, very comfortable)
And off to the event I went! I am so glad. So very glad I did it all. Although I definitely want to do some things differently next time. I got to meet some really amazing people and I felt so graceful in the francaise. It really was like time travelling but with modern toilets and french fries at the end.
Here are some pictures from the event and below that, from the photoshoot, so you can see the dress a little clearer. I also included a video of me getting dressed. I already was laced into my stays but it gives a good idea. I love that it features the World's Ugliest Pocket, which I will now keep forever and use faithfully. It may be a completely not accurate fabric print but it is mine and I love it.
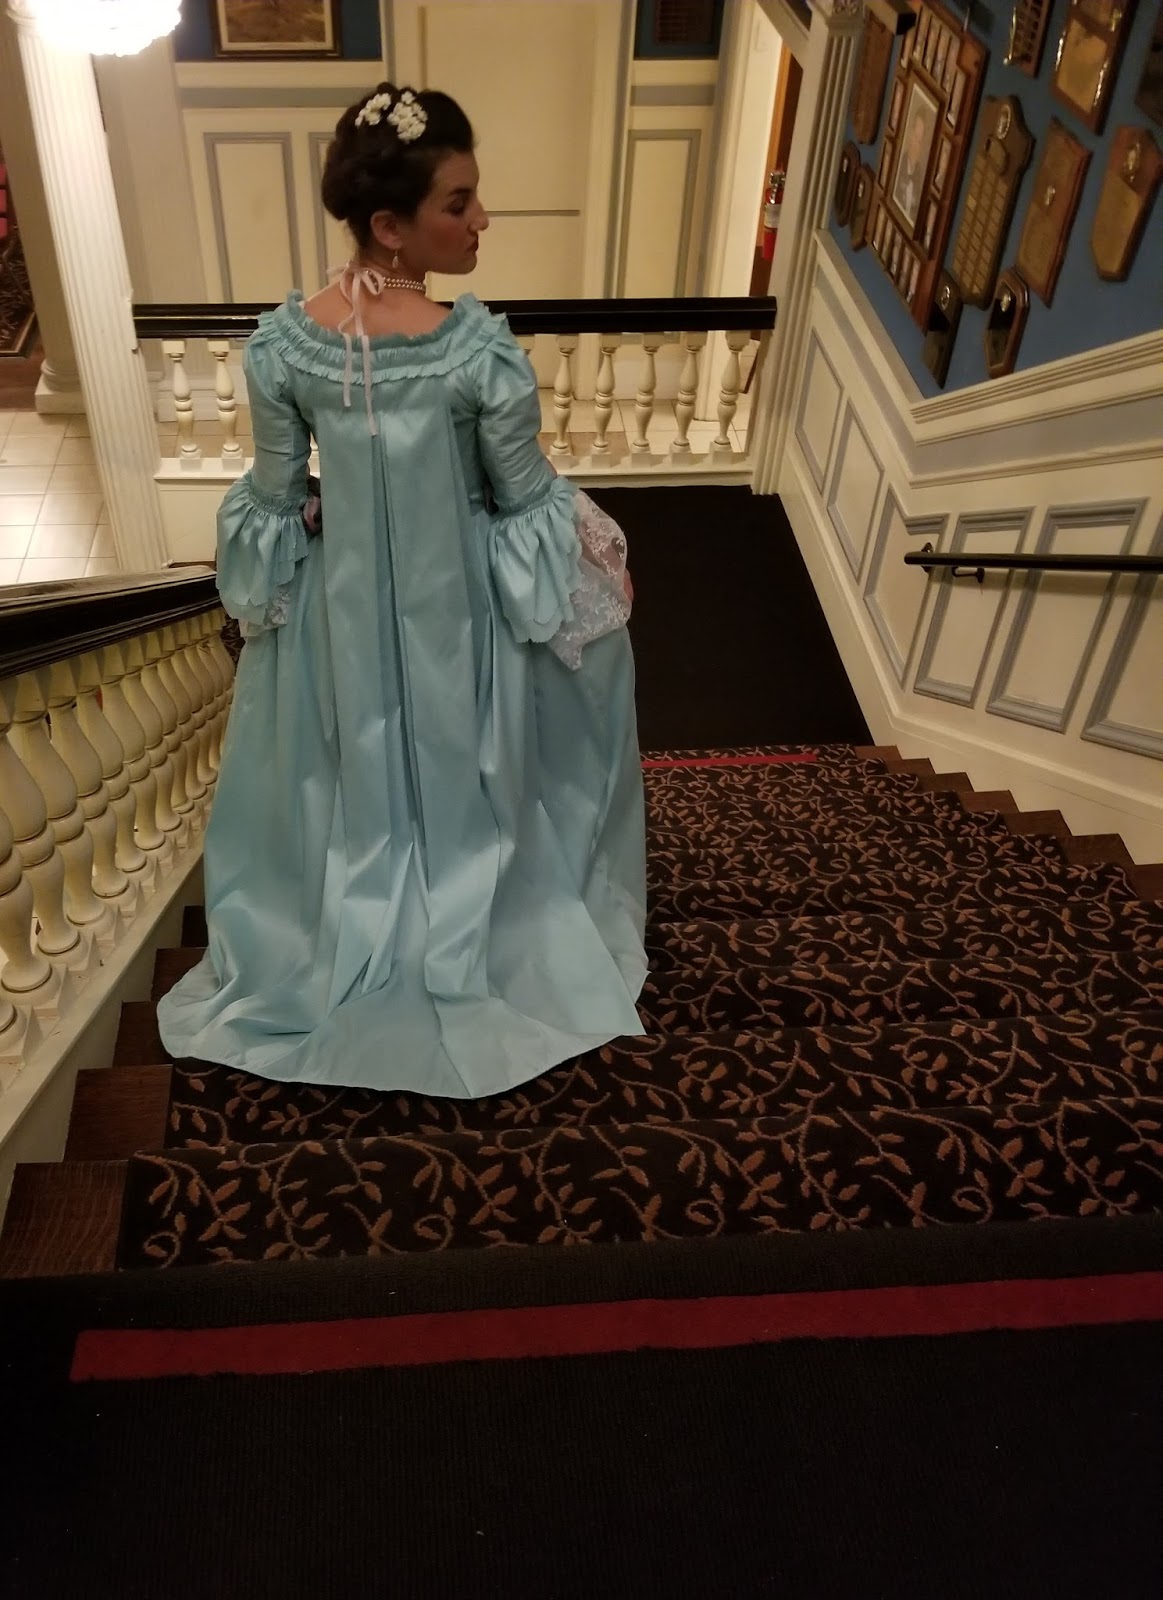

At the event, posing as one does


More posing with friends, because that is one of the nicest parts. Also, don't they look fabulous?!


I spent a lot of the event sitting and watching the dancing and talking to friends

We always do a photo of me posing like this at the column so I couldn't resist


My video isnt working on blogspot but you can view it on facebook! Follow the link below:


